personal guide for installing ns2
Adapted from https://www.nsnam.com/2023/02/ns2-installation-in-ubuntu-2204.html
A guide for setting up ns2 for simulating FANETs is available here
Try one of the following options.
Option A: use custom install script
If you have Ubuntu 22.04 or Kali Linux, open a new terminal window, and run the following command:
wget -O - https://filfreire.com/install-ns2.sh | bash
The script will ask you for a password early on, and afterwards will run for a few minutes.
To check if it worked:
- Wait until the script is done,
- open a new Terminal window, OR in your current terminal window run the command
source ~/.bashrc(orsource ~/.zshrcif you are using Kali Linux) in the terminal you are in, - try to run
nsyou will get a prompt that starts with%, - try to run
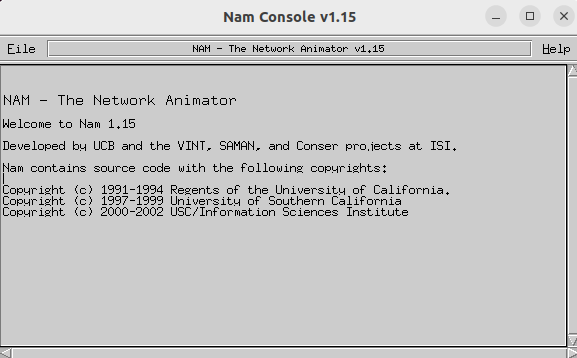
namyou should see a GUI version of nam open up.
Alternatively, try Option B
Option B: Manually compiling ns2 locally
Important note: make sure you uninstall the pre-installed ns and nam. Run sudo apt remove ns2 and sudo apt remove nam.
Since ns-2.35 is too old, it needs special compilation. First download ns-allinone-2.35, either manually from http://sourceforge.net/projects/nsnam/files/allinone/ns-allinone-2.35/ns-allinone-2.35.tar.gz/download OR, alternatively run:
wget http://sourceforge.net/projects/nsnam/files/allinone/ns-allinone-2.35/ns-allinone-2.35.tar.gz
Extract it to home folder
tar zxvf ns-allinone-2.35.tar.gz
sudo apt update
sudo apt install build-essential autoconf automake libxmu-dev gawk default-jre

echo "deb http://archive.ubuntu.com/ubuntu/ bionic main universe" | sudo tee -a /etc/apt/sources.list


sudo apt update

#ubuntu 22.04 will throw an error like GPG Error with a code like this "3B4FE6ACC0B21F32"
sudo apt-key adv --keyserver keyserver.ubuntu.com --recv-keys 3B4FE6ACC0B21F32
sudo apt update
sudo apt install gcc-4.8 g++-4.8
Make the changes in the following files, @CC@ to be replaced with gcc-4.8, @CPP@ to be replaced with g++-4.8:
ns-allinone-2.35/ns-2.35/Makefile.in
ns-allinone-2.35/otcl-1.14/Makefile.in
ns-allinone-2.35/nam-1.15/Makefile.in
ns-allinone-2.35/xgraph-12.2/Makefile.in
In all the above places, @CC@ to be replaced with gcc-4.8, @CPP@ to be replaced with g++-4.8. This can be done in place:
sed -i 's/@CC@/gcc-4.8/g' ~/ns-allinone-2.35/ns-2.35/Makefile.in
sed -i 's/@CXX@/g++-4.8/g' ~/ns-allinone-2.35/ns-2.35/Makefile.in
sed -i 's/@CC@/gcc-4.8/g' ~/ns-allinone-2.35/otcl-1.14/Makefile.in
sed -i 's/@CXX@/g++-4.8/g' ~/ns-allinone-2.35/otcl-1.14/Makefile.in
sed -i 's/@CC@/gcc-4.8/g' ~/ns-allinone-2.35/nam-1.15/Makefile.in
sed -i 's/@CXX@/g++-4.8/g' ~/ns-allinone-2.35/nam-1.15/Makefile.in
sed -i 's/@CC@/gcc-4.8/g' ~/ns-allinone-2.35/xgraph-12.2/Makefile.in
sed -i 's/@CXX@/g++-4.8/g' ~/ns-allinone-2.35/xgraph-12.2/Makefile.in
Next open and edit this file ns-allinone-2.35/ns-2.35/linkstate/ls.h. In line number 137, change the line erase to this->erase. This can be done in place:
# add this-> to the erase call that needs it
sed -i '/::erase/!s/\berase(/this->erase(/g' ~/ns-allinone-2.35/ns-2.35/linkstate/ls.h
# rm duplicate instances of this->
sed -i ':a; s/\(this->\)\1/this->/g; ta' ~/ns-allinone-2.35/ns-2.35/linkstate/ls.h
Double check if above went well, the output of sed -n '137p' ~/ns-allinone-2.35/ns-2.35/linkstate/ls.h should be:
void eraseAll() { this->erase(baseMap::begin(), baseMap::end()); }
Then finally, run ./install on the ns-allinone-2.35 folder.
Once the installation is over, Set the PATH and LD_LIBRARY_PATH information in the file located at /home/$USER/.bashrc, by running the following commands:
For Ubuntu users:
echo 'export PATH=$PATH:/home/$USER/ns-allinone-2.35/bin:/home/$USER/ns-allinone-2.35/tcl8.5.10/unix:/home/$USER/ns-allinone-2.35/tk8.5.10/unix' >> ~/.bashrc
echo 'export LD_LIBRARY_PATH=/home/$USER/ns-allinone-2.35/otcl-1.14:/home/$USER/ns-allinone-2.35/lib' >> ~/.bashrc
For Kali users:
echo 'export PATH=$PATH:/home/$USER/ns-allinone-2.35/bin:/home/$USER/ns-allinone-2.35/tcl8.5.10/unix:/home/$USER/ns-allinone-2.35/tk8.5.10/unix' >> ~/.zshrc
echo 'export LD_LIBRARY_PATH=/home/$USER/ns-allinone-2.35/otcl-1.14:/home/$USER/ns-allinone-2.35/lib' >> ~/.zshrc
To check if it all worked, open a new Terminal window, OR run source ~/.bashrc (or source ~/.zshrc if you are using Kali) in the terminal you are in.
When you run ns you will get a prompt that starts with % and when you run nam you should see a GUI version of nam open up.
Important note - make sure you uninstall the pre-installed
nsandnam. Runsudo apt remove ns2andsudo apt remove nam. If you have them installed they will conflict with the existing ones.